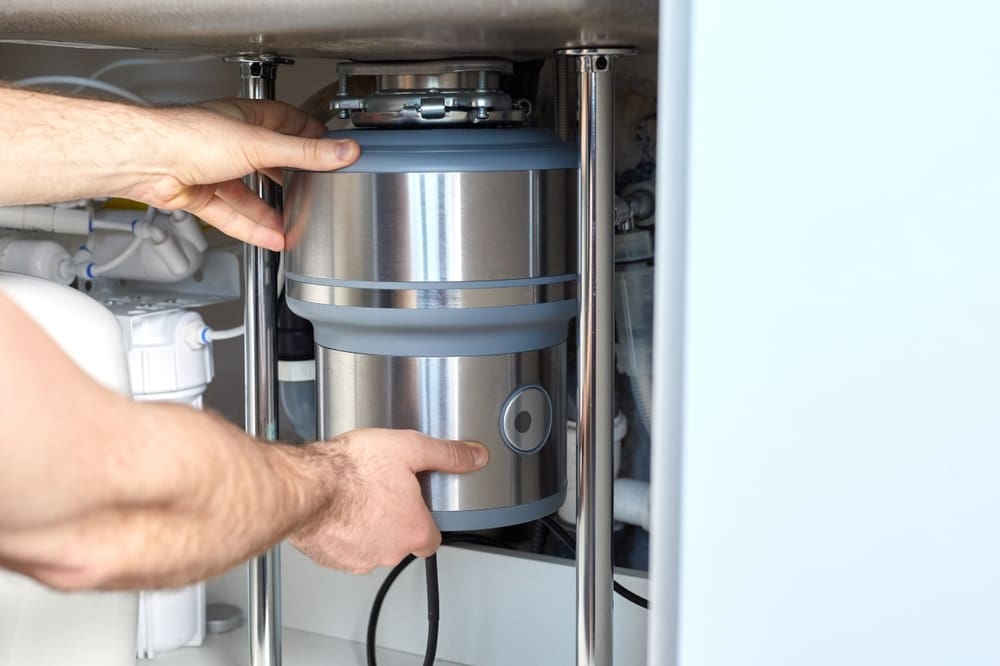
Garbage disposals are a helpful asset that lets you drain certain food scraps—without the fear of clogging. This resource is soon rendered ineffective when garbage disposal problems start to manifest. Since garbage disposals have a series of different components, it can be hard to tell what’s causing the problem.
If your garbage disposal is not working correctly, we have created an intuitive guide to help you diagnose and fix the issue. These are the steps and actions you can take to move forward.
Top Reasons Your Garbage Disposal is Not Working
Realizing your garbage disposal is not working can cause a slight panic. Unless you’re a professional, it’s common to lack knowledge about garbage disposal problems and how they start. Let’s look at the common reasons why garbage disposals cease to function properly.
1. Jammed System
Garbage disposals can become jammed when an item is preventing its blades from turning. Bones, eggshells, solidified fats or oils, and non-food items are some of the most common reasons for a jammed garbage disposal.
Even if you’re responsible for keeping these items out of your garbage disposal, putting too much food down at once can cause a jam. It’s also common for the blades of a garbage disposal to lack efficiency if they haven’t been cleaned recently.
2. Dead or Broken Garbage Disposal
Turning on your garbage disposal only to hear silence is a sign it’s “dead” or broken. A “dead” garbage disposal can result from a:
- Loose plug
- Popped-out reset button
- Faulty electrical switch
- Overloaded circuit breaker
- Dead motor
3. Leaking
The next major garbage disposal problem is leaking. A damaged or improperly connected garbage disposal can also cause drainage issues.
Garbage disposals can leak from the top, side, and bottom. When garbage disposals leak from the bottom in particular, they can leak into the dishwasher, the plumbing system, and even the drainpipe.
Garbage disposal leaks typically occur due to:
- Worn-out O-rings, gaskets, or flanges
- Loose or lackluster connections with a drain pipe or dishwasher
- Missing sealant around the disposal
The professionals at AccuTemp are ready to respond with convenient water leak repair services in New Orleans, Louisiana. Our expert plumbers have the skills and training necessary to fix your leaking garbage disposal.
4. Sink is Not Draining
Are water and food backing up into the sink? This garbage disposal problem is due to a lack of drainage capabilities, most likely due to dull blades or a dense clog.
5. Humming Noises
Humming noises with no operation means the garbage disposal is either jammed or lacking the power to break down food waste as it should. It could also be due to a poor electrical connection.
6. Odors
The longer leftover remnants of food accumulate inside the garbage disposal, the more likely it is for foul odors to start permeating. Typically, all the garbage disposal needs is a thorough cleaning to get rid of the smells. If this doesn’t do the trick, a disassembly of the garbage disposal may be required.
Require drain cleaning services in Baton Rouge or the surrounding areas? Reach out to AccuTemp today at (225) 244-8826 to receive assistance.
7. Garbage Disposal is Draining into the Dishwasher
Finding that your garbage disposal is draining water and food into the dishwasher is a leak-related issue. This type of leak happens when the dishwasher line is incorrectly installed.
8. Smoke
One of the more concerning garbage disposal problems is the presence of smoke. If your garbage disposal is smoking, it’s either due to a failing motor or a short circuit. If this occurs in your home, contact our team members for 24-hour plumbing services.

Garbage Disposal Troubleshooting and Frequently Asked Questions (FAQs)
Now that we’ve established the various reasons for garbage disposal problems, we can look at how to troubleshoot and cover some additional questions.
How Can I Troubleshoot My Broken Garbage Disposal?
There are a few ways to troubleshoot garbage disposal problems. One option is to check the power plug. Inspect the power outlet and the power cord, then unplug it and re-plug it back in. Flip the switch to see if the garbage disposal is working correctly.
Another option is to hit the reset button. If the circuit breaker trips, make sure to hit the reset button on the breaker itself and the disposal. Flip the switch and see if that is the correct solution.
Other options would include checking the breaker, the wall switch, and the wires connected to the unit. These options entail either working or closely working with electrical wiring, so it might be better and safer to leave it to a professional plumbing service provider.
Why is My Garbage Disposal Humming?
Humming noises from your garbage disposal point to a jam, lack of power, or a poor electrical connection. In the event of a jam, the problem is likely with the impeller or flywheel. Try the reset button first, then move on to turning off the power using the wall switch and circuit breaker.
You can also dislodge an obstruction by inserting the hex wrench into the flywheel hole and turning it clockwise. Once the obstruction has been removed, restore power by resetting the aforementioned buttons. Run the tap as you turn the switch on and off, washing the remaining debris down the drain.
Why is My Garbage Disposal Draining Slowly?
Oftentimes, a slowly draining garbage disposal is related to a clog or dull blades. If clogging is the culprit, a fix involves disassembling the drain trap and discharge pipe to remove the obstruction.
Why is My Garbage Disposal Leaking?
There are several reasons why your garbage disposal might be leaking. Usually, leaks stem from worn-out or loose components or an insignificant amount of sealant around the disposal. Some easy ways to fix leaks and other problems include replacing parts, tightening components, or applying sealant around the garbage disposal.
Why is My Garbage Disposal Leaking from the Bottom?
A garbage disposal may leak from the bottom when the rubber hose connected to the dishwasher is loose or damaged. Start by checking to make sure the bolts are tightened where the discharge pipe is connected to the disposal. If a leak continues, you can remove the bolts and replace the gasket seal. After reinstallation, tighten the bolts as much as possible.
When Should I Replace My Garbage Disposal?
Garbage disposal replacement is worth considering if you’ve exhausted your options to fix any of the common problems. Sometimes, garbage disposal problems like leaks and noises can’t be resolved through repair, requiring replacement. Garbage disposal replacement is common every 5 to 10 years.

Professional Garbage Disposal Repair Services
Responding to garbage disposal problems isn’t a task that can always be solved with do-it-yourself (DIY) methods. Luckily, our skilled plumbers offer exceptional garbage disposal repair services in New Orleans, Louisiana and have the tools required to restore the operation of your system.
From problems deep inside the plumbing system to electrical issues, fixing a garbage disposal is best left up to the professionals. Give our staff a call at (225) 244-8826 to receive assistance.
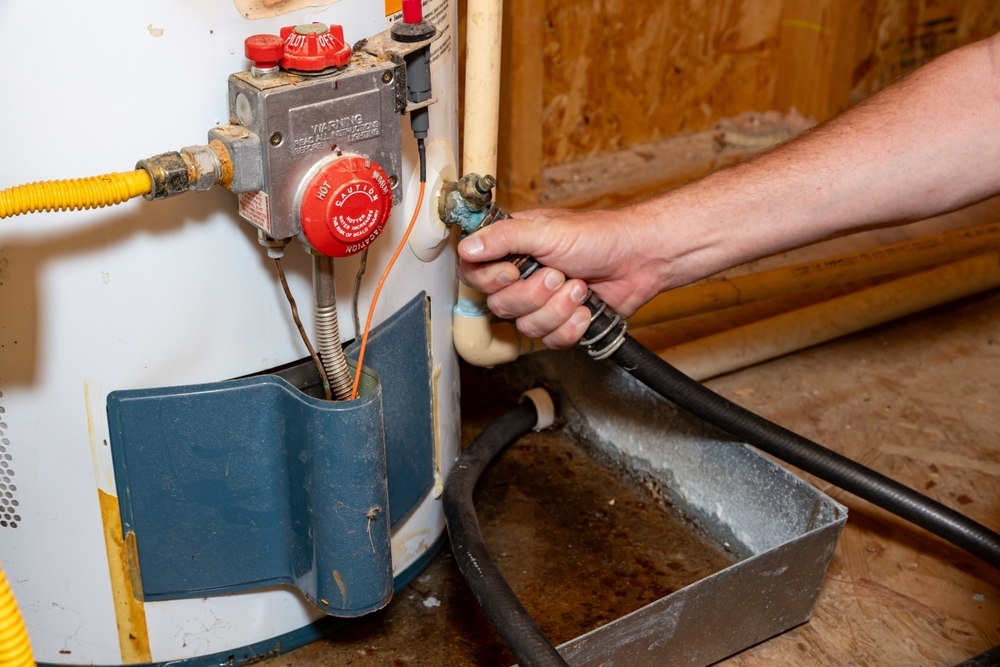
If your home utilizes a traditional gas or electric water heater, flushing it at least once a year is a good routine to get into. While this measure should be taken out of necessity, there are numerous benefits of flushing your water heater.
With our leading expertise, you’ll gain a firm understanding of the benefits of flushing your water heater and other need-to-know information.
Why is it Necessary to Flush the Tank of a Water Heater?
Flushing a water heater is an essential maintenance task for homeowners. The water that is filtered into the water heater contains dissolved minerals and impurities, which once heated, can harden and create sediment buildup at the bottom of the tank. The longer sediment is left unaddressed and continues to accumulate, the more likely it is for a decline in performance.
In addition to maintaining sufficient performance, flushing your water heater entails benefits like:
1. Longer Lifespan
Neglecting to flush your water heater creates the complication of sediment buildup. Once sediment buildup hinders the water heater’s performance, increased wear and tear will soon follow, which can lead to frequent repairs or premature replacement.
Flushing your water heater at least once a year can help extend its lifespan. With proper maintenance, gas water heaters typically last between 8 to 12 years, while electric water heaters can last around 10 to 15 years.
2. Better Energy Efficiency
Optimal performance and energy efficiency can only be achieved by routinely flushing your water heater. As sediment sits and accumulates within the water heater, performance takes a hit, and so does energy efficiency. With poor energy efficiency comes a rise in energy costs. Keep the energy efficiency of your water heater in tip-top condition by making an annual flush the standard for your home.
3. Shorter Recovery Time
The time it takes for a traditional water heater tank to refill is called recovery time. Depending on the type of unit and size of the tank, recovery times can range from 30 minutes to two hours.
Recovery times can be affected due to sediment buildup, which then affects the time it takes to get a fresh hot water supply. A benefit of flushing your water heater includes shorter recovery times and faster access to hot water.
4. Quieter Operation
Loud knocking or banging sounds from your water heater are a clear indication that it needs to be flushed. When sediment builds up, tiny bubbles formed during the heating process rise through it, causing pieces of sediment to strike the sides of the tank. Regularly flushing your water heater helps prevent this issue.
Read More: 11 Essential Steps for Cleaning a Sump Pump
5. Lower Your Energy Bills
Your energy bills can rise once the water heater struggles to maintain performance. Not only will flushing your water heater keep your energy bills on the low end, but costly repairs are less likely to be a detriment to your wallet.
6. Maintain Warranty Coverage
If your water heater comes with warranty coverage, it’s imperative that you properly maintain it. Deciding to neglect proper maintenance tasks like flushing can void the warranty, leaving you to deal with any damage. Flush your water heater and practice other necessary maintenance tasks to maintain the warranties it may have.

Tools You Will Need to Flush Your Water Heater
To flush your water heater, you’ll need a couple of tools and items to do so. Here’s what you’ll need:
- Garden hose (long enough to reach outdoors or a nearby drain)
- Towel for potential spills
- Flathead screwdriver
- Bucket (not required)
Steps to Flush Your Hot Water Heater
Now that we’ve covered the benefits of flushing a hot water heater, let’s delve into how to flush your unit. Here are the steps to follow:
- Turn off the electricity or gas
- Turn off the water inlet on the side of the water heater (turn off the water to the home if there’s no valve)
- Turn on a hot water faucet in the house to admit air into the system so the water heater can drain
- Run the hose outside or to a nearby drain
- Open the drain valve on the water heater (may require a flathead screwdriver)
- The water begins to drain from the tank (the estimated time to complete depends on the amount of water and any potential clogging present)
- Open the cold water inlet and allow it to run for a few minutes
- Close the drain valve and disconnect the hose
- Allow the tank to refill
- Air is going to sputter from the open hot water faucet within the house; turn the faucet off once a stream of water is present
When You Are Finished Flushing Your Water Heater
After you’ve completed the flushing process, there are a few other important considerations to cross off. The remaining steps include:
Making sure the pilot light is lit when the gas is turned back on (for gas units)
Turning on the electric power or gas to the water heater
Lighting the pilot light if the gas was turned off, or returning the temperature to its original setting
Inspecting the area for leaks
If a leak is present, turn to AccuTemp for water leak detection and repair. If your home uses a tankless water heater, we offer repair services for these units as well.
Read More: What Are the Main Causes of Clogged Drains in Homes?
How Often Should You Flush Your Water Heater?
Generally, water heaters should be drained and flushed at least once a year. Take note of the operator’s manual if this is suggested differently.
During the yearly flush, test the pressure relief valve and inspect the overflow drain to check if it’s clear. Open the pressure relief valve for a few seconds to allow water to run out, and check the overflow drain to make sure that water runs through.

Professional Hot Water Heater Maintenance and Repair Services
As one of your home’s most important systems, a damaged or inefficient water heater can make daily life the ultimate inconvenience. Luckily, our team of trained plumbers offer trustworthy water heater repair services in New Orleans, Louisiana and the surrounding areas.
Do you need help fixing a tankless system? The professionals from AccuTemp also offer extensive tankless water heater repair services and will help you restore access to hot water.
Our staff members also offer other types of plumbing solutions for homeowners such as water leak detection, sump pump installation, faucet replacement, and drain cleaning. Contact our staff to receive assistance with a defective water heater or other plumbing issues in your home.
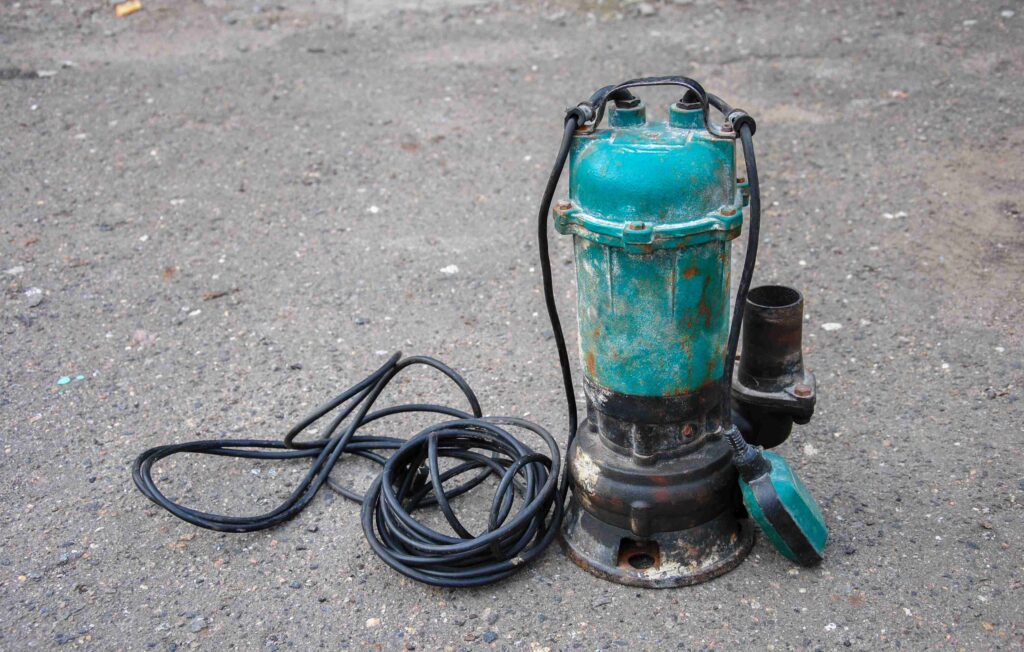
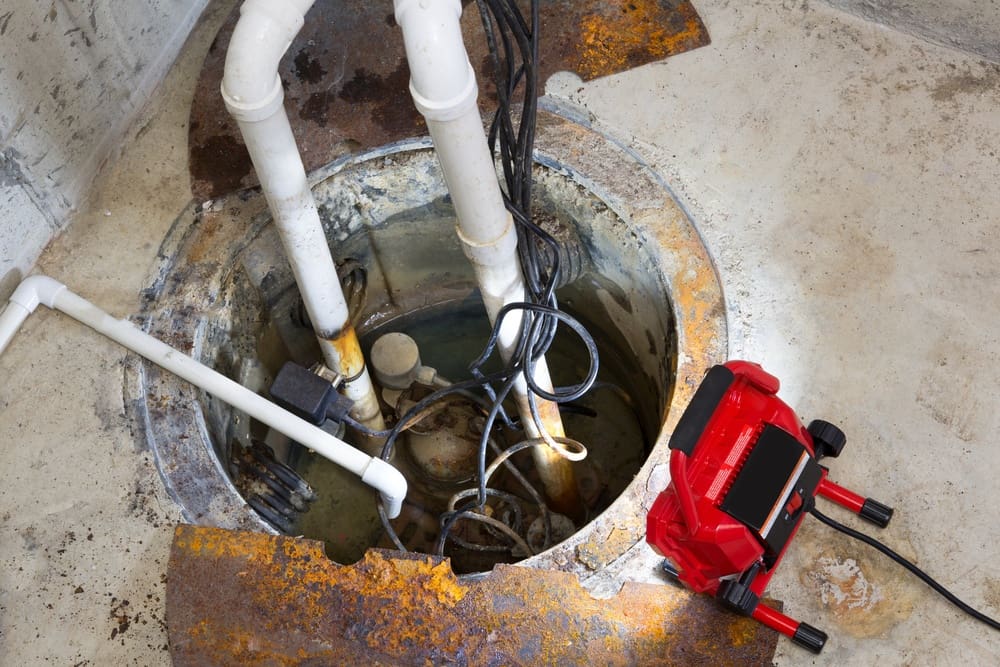
Sump pumps are a key aspect of maintaining a dry and safe basement. A functioning sump pump is required to prevent accumulating water, which can cause flooding and water damage. Keeping the sump pump in your home operational and efficient starts with regular cleaning.
With knowledge from the team of plumbing experts at AccuTemp, you will gain a firm understanding of how to clean a sump pump in eleven easy steps. This way, your basement can stay free of moisture and avoid potential damage from occurring after a heavy storm or appliance leak flood.
How to Clean a Sump Pump Correctly
A quick brush-over isn’t enough. A proper and thorough cleaning of the sump pump is the best way to keep it functional—preventing occurrences of standing water. Here are the steps on how to clean a sump pump correctly:
1. Make Sure the Sump Pump Works
First, you will need to make sure the sump pump works. Find a bucket, fill it with a couple of gallons of water, and dump it into the sump pit. The pump should turn on and drain the water. If it doesn’t turn to a professional to inspect and repair your system.
2. Check to Confirm Conditions Are Safe for Maintenance
Sump pump cleaning should be avoided when the system is actively taking in water. Make sure it’s not raining outside or water from appliances isn't draining into the sump pump basin. Not only can this make sump pump cleaning messier and more difficult, but it’s also potentially hazardous.
3. Remove the Pump
The next step of cleaning your sump pump is to remove the system from the pit. Disconnect the pipe leading to the pump underneath the check valve with a screwdriver. Use a bucket to catch water and anything else that may come out. Raise the pump out of the pit and place it on a plastic sheet or tarp.
4. Turn Off the Power Supply
Of the most important steps, cutting off the sump pump’s power supply is number one. As removal is being conducted, unplug the pump from the electrical outlet. Never clean or repair your sump pump when it’s powered on—it’s a safety concern.
Read More: What Are the Most Common Causes of Clogged Drains in Homes?
5. Prepare the System for Cleaning
Move your sump pump onto a plastic sheet or tarp to catch dripping water or runoff. The plastic sheet or tarp underneath allows free rein when it comes to cleaning.
6. Spray the Sump Pump
Once the sump pump is placed in an appropriate spot, use your garden hose to spray it down. Spraying the pump rinses off buildups of dirt, dust, sludge, and other residues or debris. Make sure the pump has been entirely cleaned off.
7. Remove Excess Materials
If there is leftover debris that was unable to be removed through the previous step, apply a scraping tool to the area. While you are cleaning your sump pump and scraping away at the leftover debris, make sure not to damage the components of your system.
8. Rinse the Pump
Once the debris has been removed, use your garden hose to rinse the sump pump again. This final and thorough rinse of the pump is there to make sure everything is spotless—free of lingering remnants. The entirety of the pump should be rinsed, even the intake and exhaust.
9. Drain the Check Valve
Sump pump systems include a check valve, an important component responsible for preventing water from flowing back to the sump pit. The check valve needs to be drained due to the build-up of debris and water over time.
Place a bucket underneath the check valve and remove the remaining water and debris. This step keeps the valve free of obstruction and functional, which allows the pump to operate as it should.
10. Remove Standing Water from the Sump Pit
Grab your wet/dry vacuum and remove the remainder of the standing water from the sump pit. You can also use the vacuum to clean spills or messes made during the sump pump cleaning process.
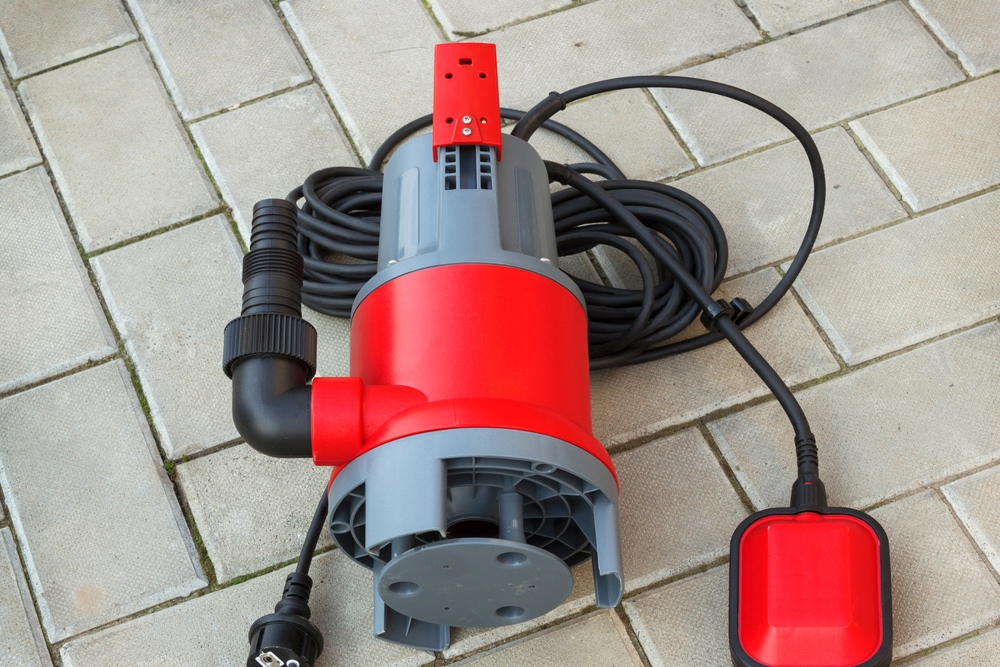
11. Reinstall the Sump Pump
Lastly, place the pump back in the pit and reconnect the pipe and power. Before reconnecting the power and turning the system back on, make sure the cords and plugs are dry.
Sump Pump Cleaning Frequently Asked Questions (FAQs)
How Often Should You Clean Your Sump Pump?
It’s recommended to follow the cleaning regimen provided by the pump’s manufacturer. Sump pumps typically should be cleaned either every year or every six months. If you’ve noticed excess water or remnant buildup, especially after heavy snow or rainfall, clean it sooner.
Can You Use Vinegar in Your Sump Pump?
Straight vinegar should never be poured directly into the sump pump. A 1:1 mixture of vinegar and water can be used to clean off the pump during the sump pump cleaning process. If the sump pump’s pit is dirty, you can place one gallon of vinegar and two gallons of warm water to clean it. Make sure to let the pit sit for at least 20 minutes before reconnecting the pump and rinse the pump with five gallons of clean water.
Read More: Why Do You Need to Flush Your Water Heater?
Can You Use Bleach in Your Sump Pump?
Yes, bleach can be used as an odor fighter for sump pumps. Avoid the usage of bleach if you have a septic system. Create a mixture of one cup of bleach for every gallon of water and pour it into the sump pit after cleaning. Enough of this mixture should be poured in to activate the pump and drain the water.

Sump Pump Repair and Installation Services
Keep your home’s basement clean and free of water damage with our available sump pump repair services in New Orleans, Louisiana and the surrounding areas. If our team is not able to fix your defective system, we can also perform comprehensive sump pump installation services to keep your basement dry.
Do you need help with a different plumbing emergency in your house? Luckily, our staff members offer a variety of other plumbing services including drain cleaning, leak detection, sewer video inspections, backflow testing, hot water heater repair, hydro-jetting, and water line replacement. Call our team at (225) 244-8826 to receive support.